Creating Products
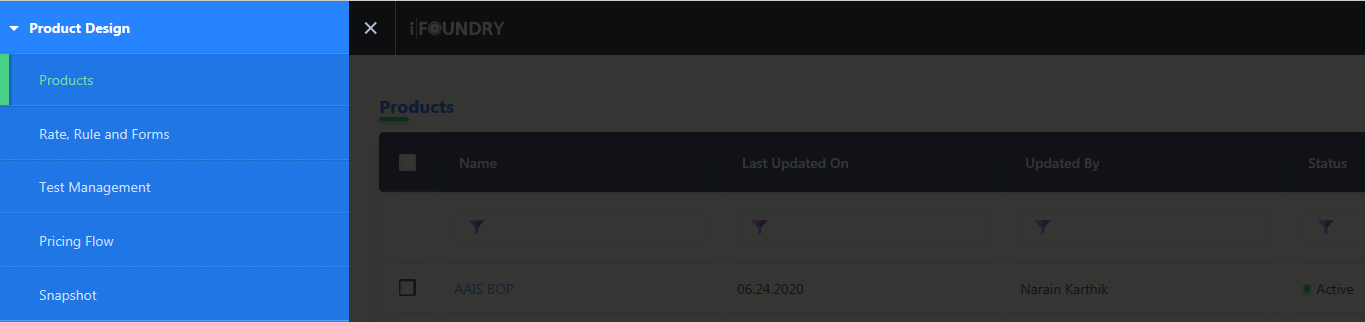
1. From the main menu, navigate to the ‘Product Design’ module, and click on Products.
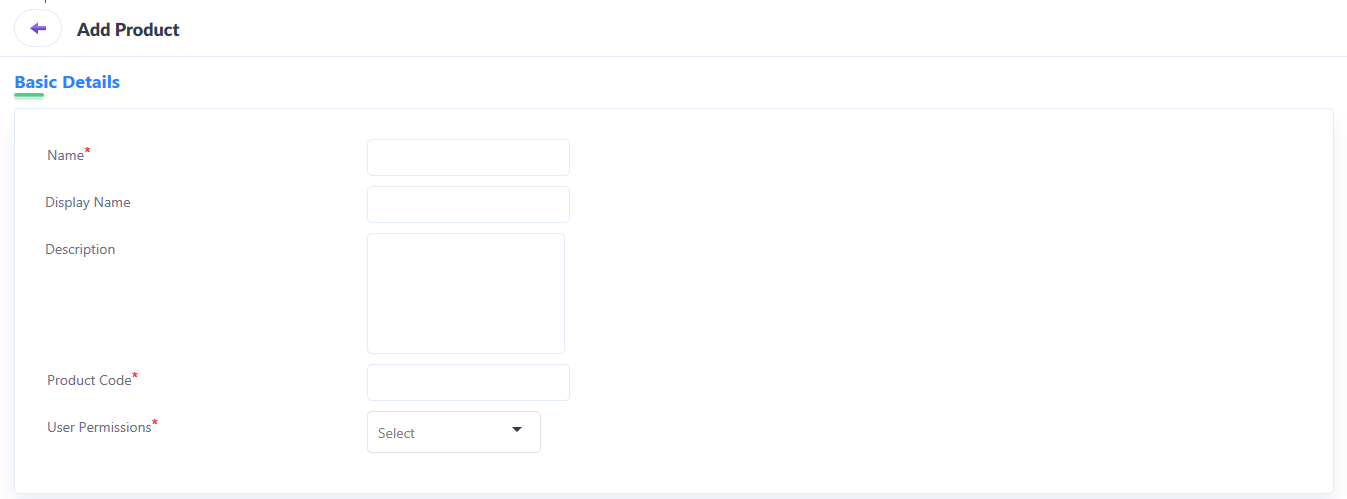
2. In the new window that appears, a product must be created. To do so, click on ‘+’ icon appearing on top of the grid.

3. Under Basic details section, input information into the fields:
Name: Input a desired name for the product.
Display Name: Input a desired display name for the product.
Description: While optional, a generic description about the product can be included.
Product Code: Input the product code.
User Permissions: Choose the applicable User Permissions from the drop-down list.
4. After inputting basic details pertaining to the creation of a product, navigate to the plan info section.
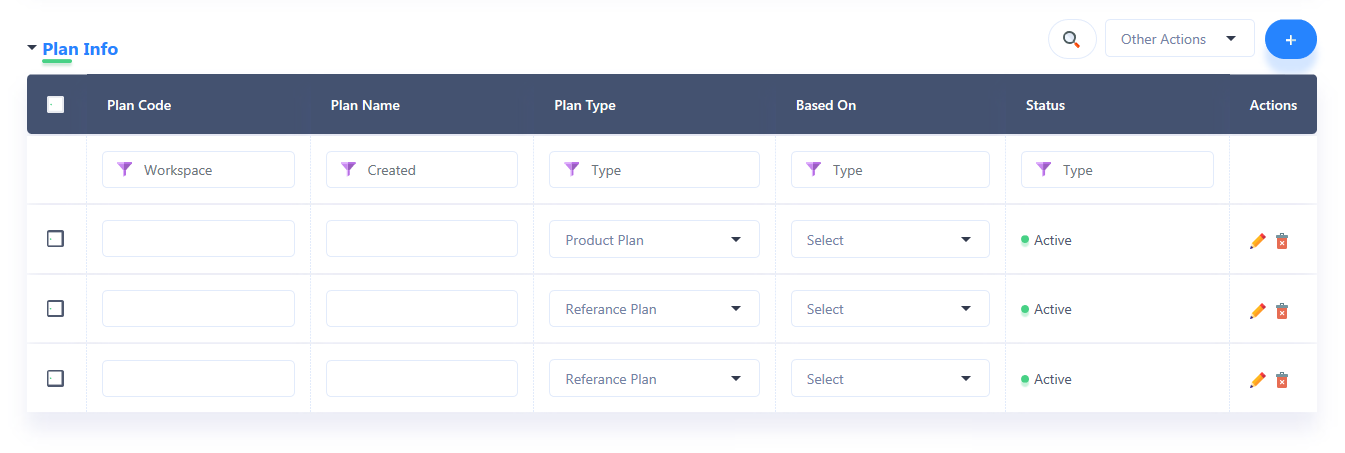
The details that must be input here include the following.
Plan Code: Input the code of the plan you wish to create.
Plan Name: Input a desired name for the plan you wish to create.
Plan Type: Depending on whether the plan you wish to create is a product plan or a reference plan, the applicable type must be selected from the drop-down list.
Based on: Select the plan based on which the new plan is being configured.
Status: Shows the status of the plan being created, i.e., whether it is Active, or Inactive.
5. The plan info section also provides a set of actions such as edit and delete against each plan configured.

6. The plan info section also provides the user the ability to delete one plan or multiple by marking check box against each plan. To do so, click on Other Actions drop-down list appearing on top of the grid.

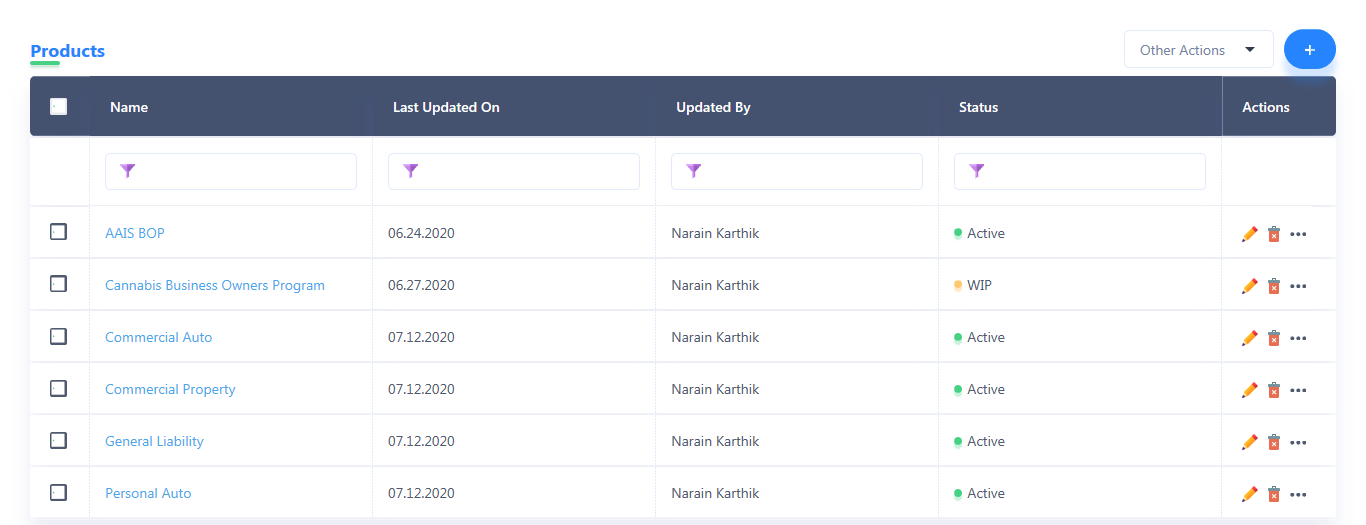
7. Once all the details have been input, click on Submit to finish creating a product. If you wish to add another product, click on Save & Add Another.

8. The product so created appears in the products grid.
7. The plan info configured here is then used in the Workspace to create plans or update existing plans.